Omnitracs Tax Manager 1.5 New Features & Enhancements
Overview
Omnitracs Tax Manager 1.5 contains the following new features and enhancements.
- You can now run a reconciliation report to review the tax calculations for each vehicle.
- You can create labels and assign them to vehicles, where they can be used to filter vehicles included in a report.
- You can run a fuel purchase report.
New Features and Enhancements
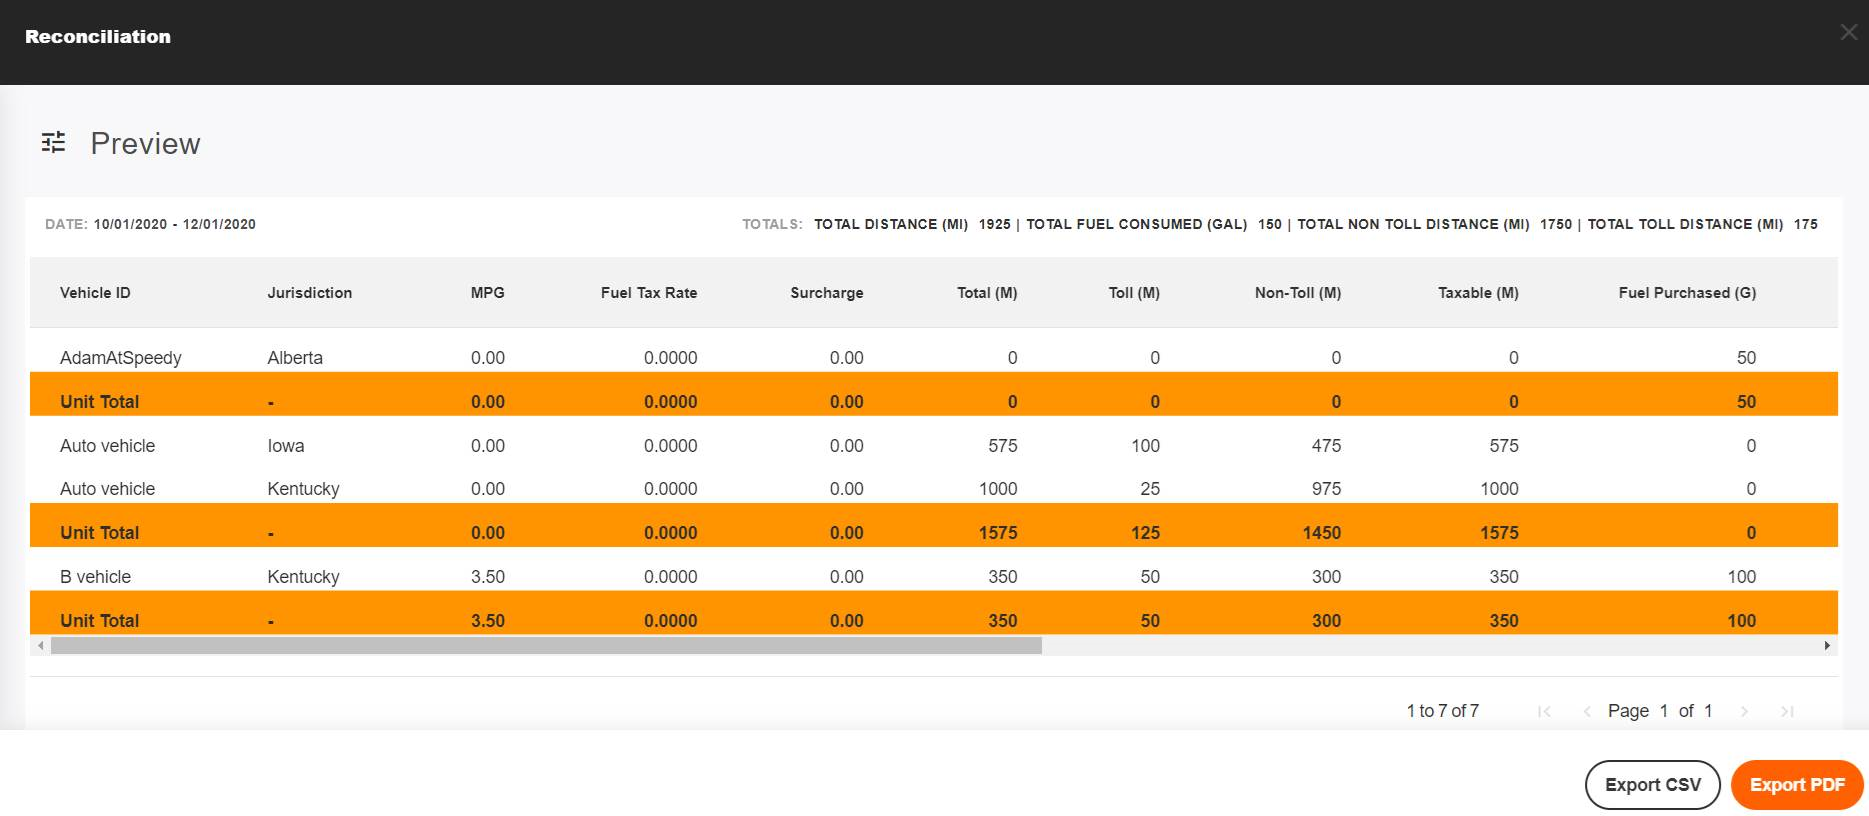
Reconciliation Report
Periodically you may need to be able to audit your IFTA taxes for the vehicles in your fleet. Tax Manager now includes a Reconciliation report that provides an accurate breakdown of the tax calculations by vehicle, with data for each state listed under the vehicle.
Note: Currently the Reconciliation report is available using standard measurements (Gallons, Miles, and US dollars); the report will be available using metric measurements in a subsequent release.
- Click Reports. The Standard Reports list opens.
- Click Reconciliation report. The report opens.
- Click the Settings icon to open the Filters panel.
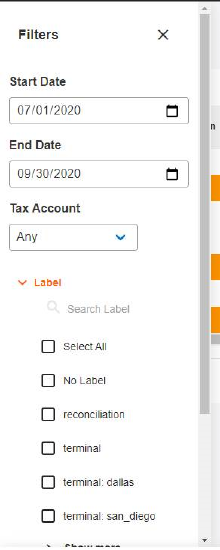
- Select the date range for the report.
Note: You can run the report for a single month, or a single quarter, but you can not span multiple IFTA quarters. For instance, you can run the report for Jan 1 - March 31, Jan 1 - Jan 31, but not from March 1 - April 30. - Use the Tax Account, Label, and Vehicle ID to filter the report to include the vehicles you want.
- Click [Generate]. The report appears on the screen.
- To export the report, click [Export CSV] or [Export PDF].
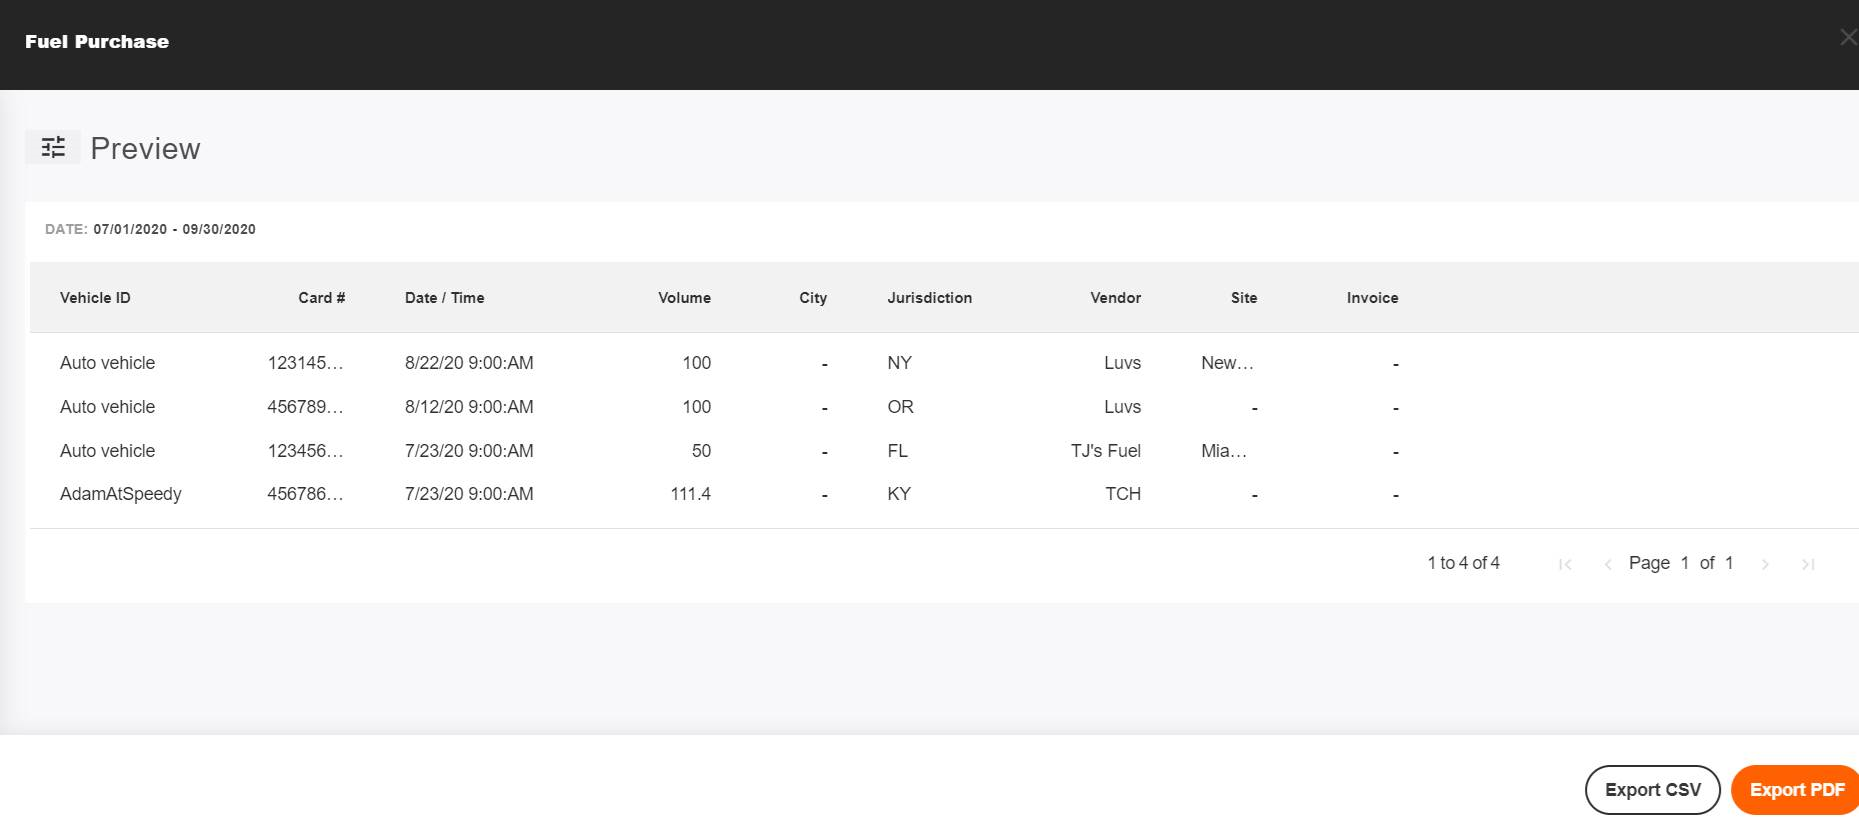
Fuel Purchase Report
The Fuel Purchase report allows users to filter and export fuel purchases that were loaded into the system so that they can be reviewed and audited.
Note: Currently the Fuel Purchase report is available using standard measurements (Gallons, Miles, and US dollars); the report will be available using metric measurements in a subsequent release.
- Click Reports. The Standard Reports list opens.
- Click Fuel Purchase report. The report opens.
- Click the Settings icon to open the Filters panel.
- Select the date range for the report.
- Use the Jurisdiction, Label, and Vehicle ID to filter the report to include the vehicles you want.
- Click [Generate]. The report appears on the screen.
- To export the report, click [Export CSV] or [Export PDF].
Working with Labels
Labels provide a way for you to filter vehicles when running a report. If you want to use labels, first you need to create the labels, then assign them to the vehicle. Labels can be grouped together into categories; for instance you could have a label category called Terminal, with individual labels within the category for each of your terminals.
Creating Labels
Notes: Currently you can not delete labels or label categories, so please make sure to enter meaningful labels and categories. The ability to delete labels is planned for a subsequent release.
You can not include spaces in the label name; use an underscore ( _ ) where you want the space to be.
You must enter the labels in lower case, but they will display in upper case letters.
- Click Administration. The Labels window opens.

- Click [Add Label Category]. A popup opens with the text name label key.
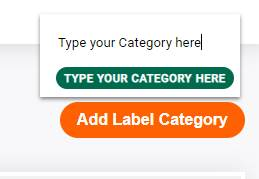
- Enter the name of the label category, then click outside the box.
Once you have created your label categories, you can create the labels with the category.
- In the Label Values for the category, click the add icon. A box opens with the text name label value.
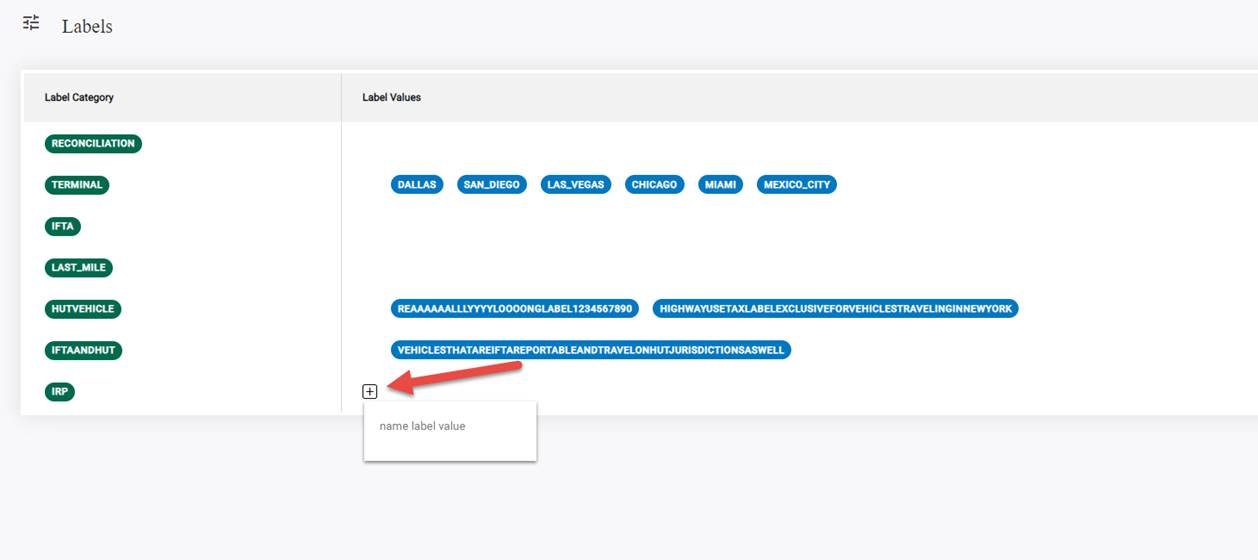
- Enter the text you want for the label.
- Click outside the box when done.
Adding Labels to Vehicles
Once you have created your labels, you can add them to the vehicles.
- Click the Vehicles menu. The Vehicles list opens.
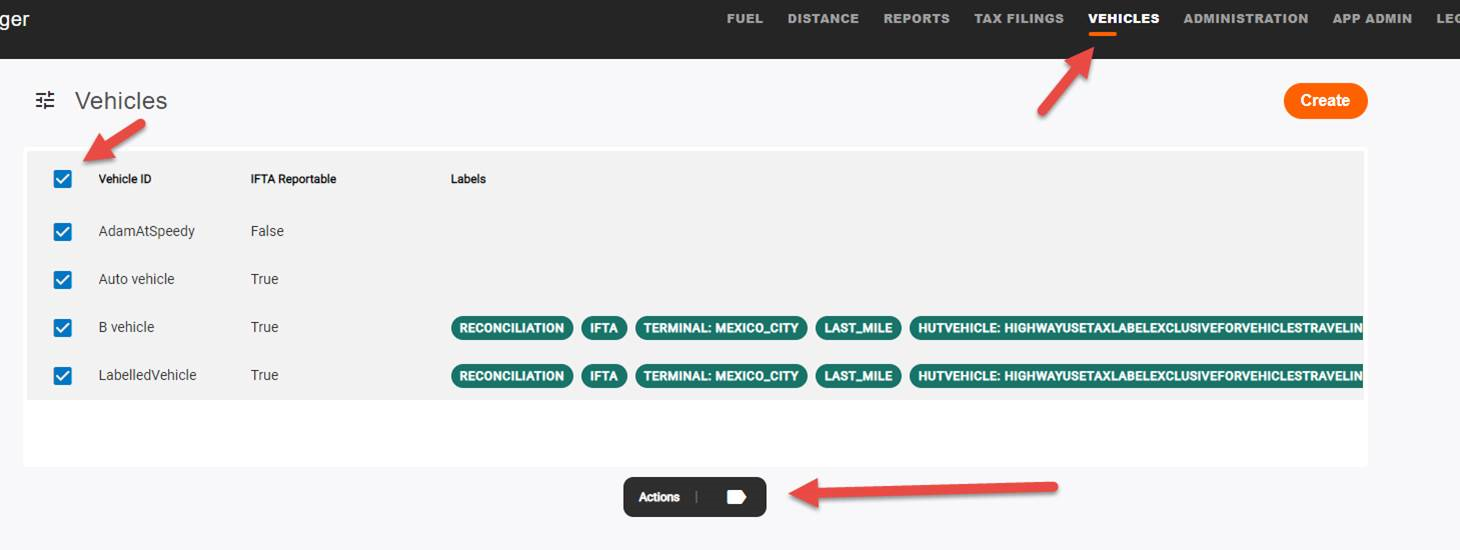
- Check the vehicles you want to add a label to, then click Actions. The list of labels pops up.
Note: If you want to assign the same labels to multiple vehicles, check all the vehicles you want to assign the labels to.
You can use the vehicles filters to limit the vehicles listed, making it easier to find the vehicles you want. - Click on the label you want to associate with the vehicle, then click [Save].
Note: If you want to associate multiple labels with the selected vehicles, hold down the [Ctrl] key while clicking the labels.
If you made a mistake selecting the labels and want to clear all selections, click [Reset]. - Continue selecting vehicles to assign the appropriate labels.
Using Labels when Running Reports
Once you have created your labels and assigned them to your vehicles, you can use labels to filter vehicles when running reports.
- On the report you want to run, click the Settings icon to open the report's Filters.
- Click Label. The list of all labels opens. All the labels are selected by default.
To filter the vehicles by an assigned label, click Clear All, then select the labels you want to include.
To remove selected labels, click the black X icon next to the label.
To include all vehicles with a label within the label category, choose the label category.
To include vehicles that are not assigned a label, choose No Label.
All vehicles assigned any of these labels will be included in the report.
- Select other filters you want for the report, then generate the report.
Software Corrections
| Issue Key | Release Notes | Component |
|---|---|---|
| TM-2227, TM-2380 | The logic to properly account for gaps in GPS has been updated to ensure the accuracy of distance records. | Reports |