Omnitracs Drive 6.5 Mobile Release
Overview
We are pleased to announce that Omnitracs Drive and CoPilot v6.5 Mobile Release is available. This release includes feature enhancements and software corrections.
Features
Updated APK Versions
| CoPilotDriveAndroid (APK) | 6.5.0.0030 |
| DocsAndroid / Scanning (APK) | 6.5.0.0002 |
| DriveAndroid (APK) | 6.5.2.0083 |
CoPilot
We continue working to enrich your experience with the application.
This version includes two important functionalities, AMS authentication and Map Upgrades.
Look at these important considerations:
- Both Drive and CoPilot apps should be upgraded to the 6.5 release.
- The Customer should have a Fleet portal account for mobile app licensing to work.
- Before launching Copilot app, Mobile Device ID needs to be configured as Asset under Account Manager in Trimble Fleet Portal (To do this please see the “Steps to add a Mobile Device ID asset in Trimble Fleet Portal” section).
- Until 6.4, CoPilot app will work even when it is not registered in Fleet portal, because the device will be auto-added to the Trimble Fleet portal bucket account. This will not be the case in 6.5 and going forward.
- Vehicle ID needs to be configured in Trimble Fleet Portal for functionalities like route reporter, routing profile, and route modifiers to work (To do this please see the “Steps to add a Vehicle ID in Trimble Fleet Portal” section).
- Vehicle Group must exist to be able to associate additional functionalities like route reporter, routing profile, and route modifiers (To do this please see the “Steps to add a Vehicle Group in Trimble Fleet Portal” section).
- Vehicle Group and Vehicle IDs must be associated in Trimble Fleet Portal for route reporter, routing profile, and route modifiers to work (To do this please see the “Steps to associate Vehicle ID to Vehicle Group in Trimble Fleet portal” section).
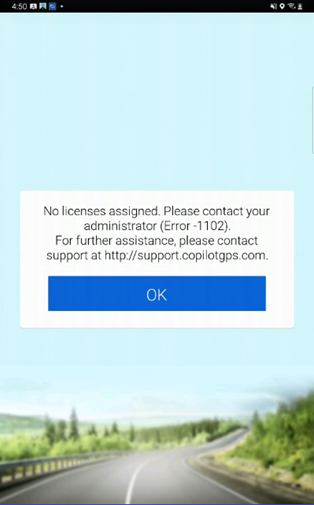
- CoPilot will display the following message when the same license is used on another device: Shutting down CoPilot due to expired or invalid licenses. Please contact your fleet admin.
- In Fleet Portal the naming convention of Vehicle ID and Mobile Device ID had some changes, now the Vehicle ID format is <rnavehicleid>-<rnacustomerid>-<environment> and the Mobile Device ID format is <mobileid>/<environment>.
- Vehicle IDs and Mobile Device Assets IDs must be unique to work.
- It is highly recommended to follow the same vehicle group/equipment type between OT1 and Trimble FP.
- Android mobile devices need to have connectivity at least once a week, for CoPilot mobile app licensing to work.
- Need regular Wi-Fi connection to download or upgrade the maps. Map download or upgrade is not supported through the AMG-C or Relay connection.
- When launching the applications please wait until the initialization is completed.
- CoPilot navigation settings are based on the truck type configured.
- In the Local.ini file, CoPilot saves the current AMS configuration information under the License section: deviceid, environment, status, tenantid, and type of auth.
- The CPIK library was updated to support special characters.
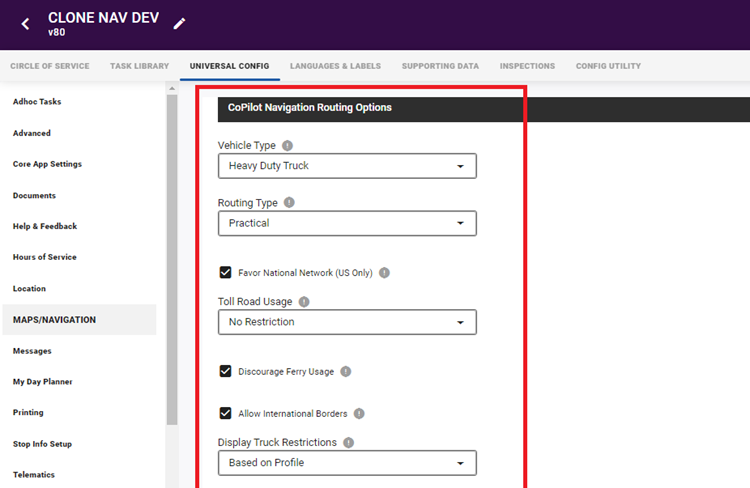
- The following Setting Options can now be remotely configured in the Command Portal under the CoPilot navigation Routing Options:
- Allow International Borders (For all truck types)
- Routing Type: Fastest (For all truck types)
- The Display Truck Restriction value set in Command is now honored and retrieved by the CoPilot app.
- To improve Customer Support, the logs now save the destination address and coordinates of received Drive Stops.
- CoPilot maps will now be updated quarterly.
- The map version will be auto updated to the latest version in the background.
- CoPilot will display the following message when Wi-Fi is needed to upgrade maps: Need Wi-Fi connection to upgrade maps.
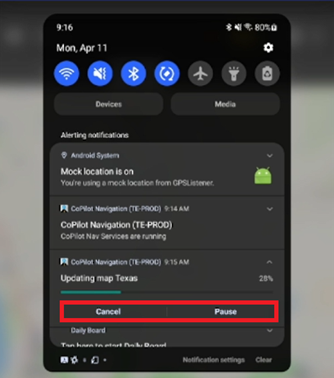
- The Android notification menu displays the progress status bar for the map upgrade process.
Drive/Command
- Modified the grid view, list view, and map popup context to display the Workflow Stop Type.
- The RNA Dispatch record for Unplanned Stop Types will default to Generic, but can also be recorded as Generic, Break, or Layover.
- Models and mapping updated to include attachments.
- When files are attached to dispatch to a driver message in RNA, the files are now sent to MilesAhead with the message to be downloaded by devices.
- Added the ability to attach a picture in Messages from either the camera or image library.
- Redeliver functionality modified to be simpler for the user with dropdown choices for desired actions
- Unplanned Stops captured in Drive are now reflected in Fleetview..
- Modified the Connect to Vehicle process to keep the user in Drive avoiding transition to XRS compliance application.
- New Connected Equipment view provides single-click access to drop, hook, and DVIR tasks.
- Modified colors and fonts and provided other small visual improvements to support the latest brand and enable better consistency across all applications.
- Single Sign On integration support for Supervision CSA Performer.
- Add "Hide Cancelled Stops" option to My Day Planner.
- Allow cancellation of Unplanned Stops.
Driver Vehicle Inspection Report (DVIR)
The driver is not required to complete a Driver Vehicle Inspection Report to activate equipment on Hours of Service (HOS) logs for customers who do not have DVIR as a mandatory requirement of a load.
Hook Trailer Data
The Hook Trailer Task auto populates the trailer data for the driver, so that the driver does not need to enter it manually.
Steps to add a Mobile Device ID asset in Trimble Fleet Portal:
To grant the license access of your application, a Mobile Device Asset must be added to Trimble Fleet Portal, please follow next steps to do it:
Add a Single Device ID
1. From a browser (Chrome is recommended), visit https://copilotfleetportal.alk.com/login
2. Enter your valid credentials (To get credentials, please contact Trimble Support: support@trimblemaps.com)
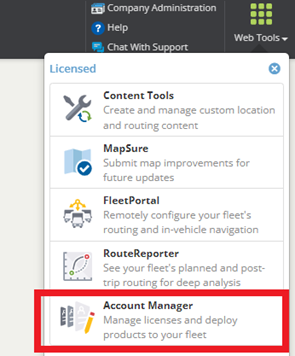
3. In the top right select “Web Tools” option

4. From the dropdown select “Account Manager” option.

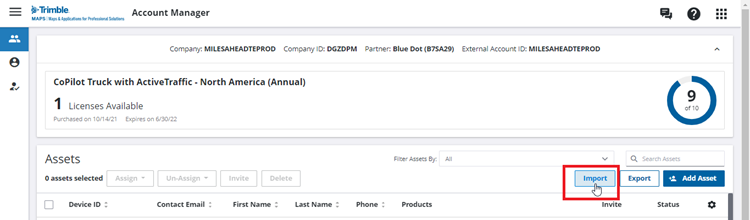
5. In the opened portal select “Add Asset” option

6. Fill in the form, make sure to use the Device ID with matching data that exists in OT1 with next format: mobileid/environment e.g. 9987654321/prod
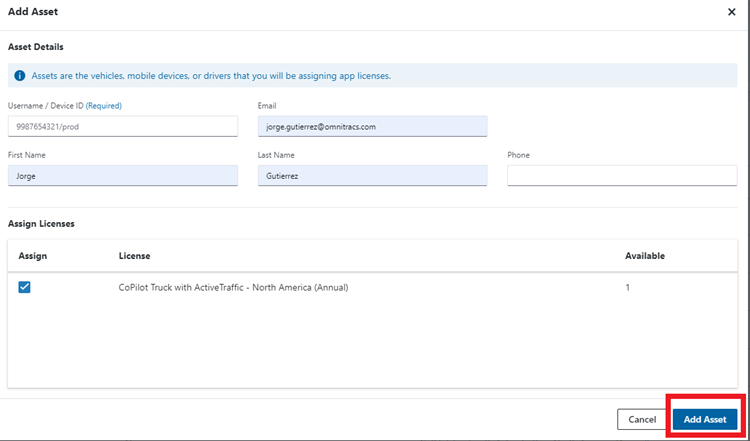
7. Check the box of the license available.
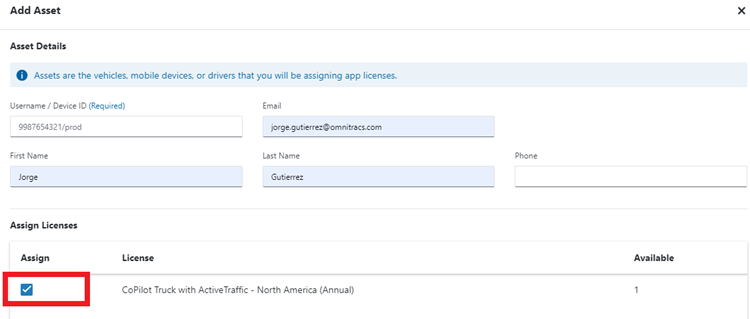
8. Click on “Add Asset” button.
Import multiple Device IDs
1. From a browser (Chrome is recommended), visit https://copilotfleetportal.alk.com/login
2. Enter your valid credentials (To get credentials, please contact Trimble Support: support@trimblemaps.com).
3. In the top right select “Web Tools” option

4. From the dropdown select “Account Manager” option.
5. In the opened portal select “Import”
6. Select “Download CSV template”
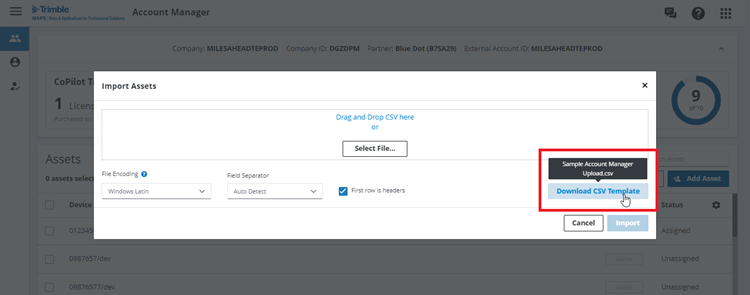
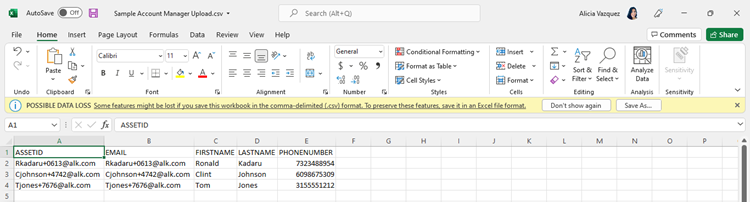
7. Fill the Excel File
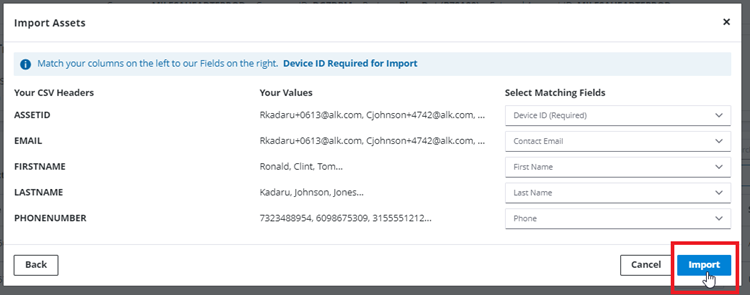
8. Upload and import the file
Steps to add a Vehicle ID in Trimble Fleet Portal:
To grant the full integration of the Vehicle and get the best of CoPilot routing experience, a Vehicle ID must be added to Trimble Fleet Portal, please follow next steps to do it:
Add a Single Vehicle ID
1. From a browser (Chrome is recommended), visit https://copilotfleetportal.alk.com/login
2. Enter your valid credentials (To get credentials, please contact Trimble Support: support@trimblemaps.com).
3. Select “Company Administration” option located on upper right corner.

4. Click on “+ New” button.
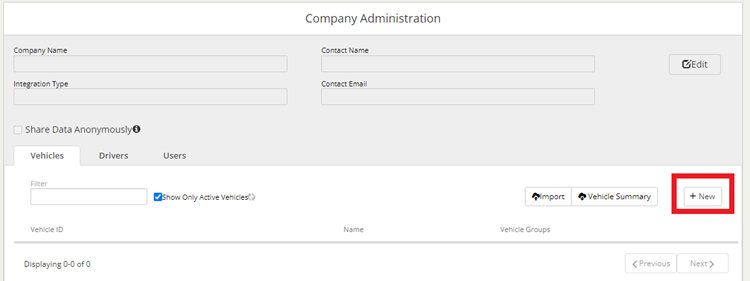
5. Insert Vehicle ID with next format: truckid-customerid-env (e.g. 5525262728-milesahead-prod).
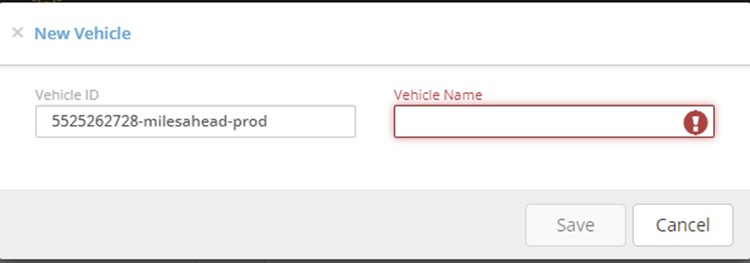
6. Insert any Vehicle Name (there is not a specific rule for this field).
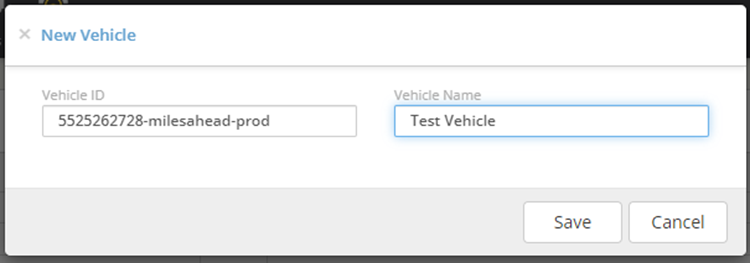
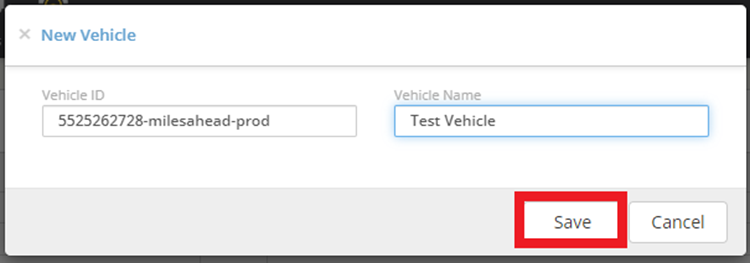
7. Click on the green “Save” button.
Add multiple Vehicle IDs
1. From a browser (Chrome is recommended), visit https://copilotfleetportal.alk.com/login
2. Enter your valid credentials (To get credentials, please contact Trimble Support: support@trimblemaps.com).
3. Select “Company Administration” option located on upper right corner.

4. In the page select “Import”
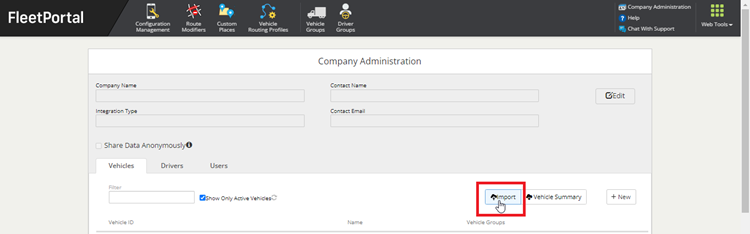
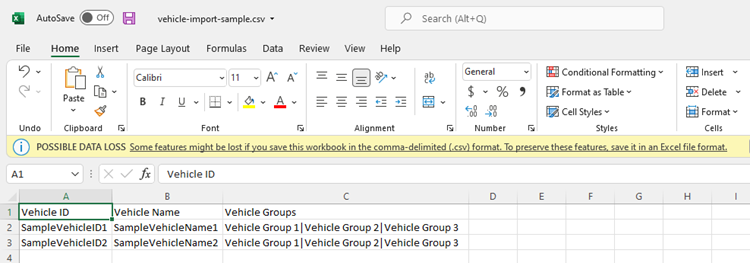
5. Select “Download sample import file”
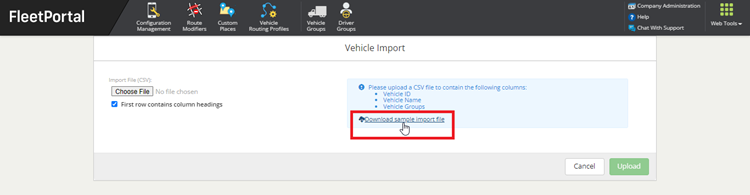
6. Fill the Excel File
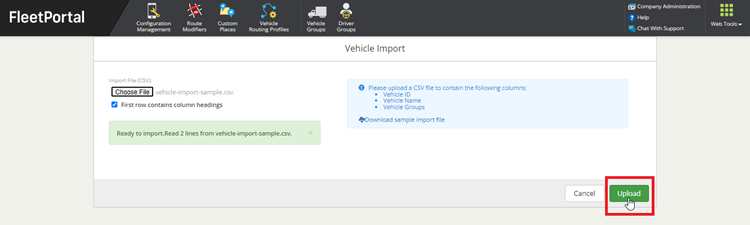
7. Upload and import the file
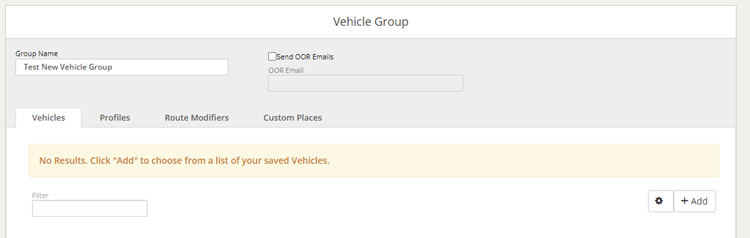
Steps to add a Vehicle Group in Fleet Portal:
To grant the full integration of the Vehicle and get the best of CoPilot routing experience, a Vehicle Group must be added to Trimble Fleet Portal, please follow next steps to do it:
1. From a browser (Chrome is recommended), visit https://copilotfleetportal.alk.com/login
2. Enter your valid credentials (To get credentials, please contact Trimble Support: support@trimblemaps.com).
3. Select “Vehicle Groups” option located on the top center of the page.

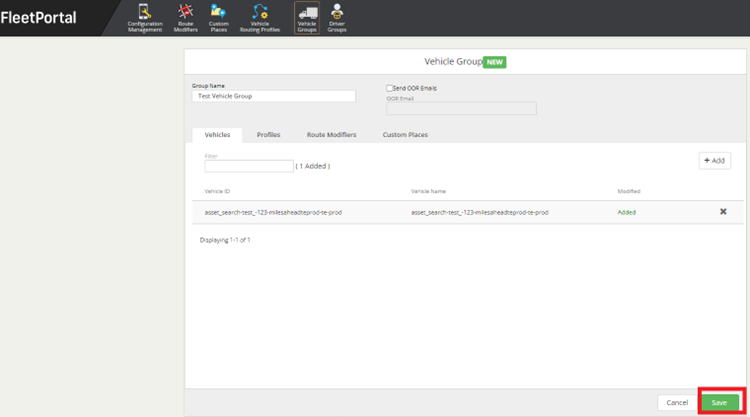
4. Click on “+ New Vehicle Group”.

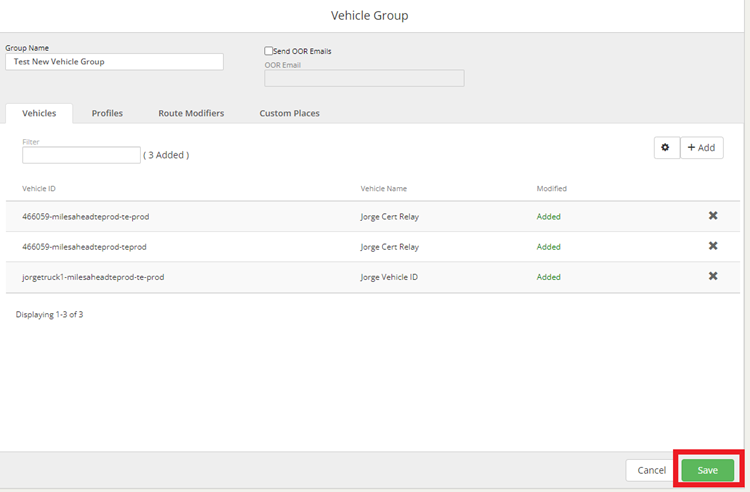
5. Enter any Vehicle group name in the box “Group Name”.

6. You can either add prior created Vehicles or save the Group empty and come back to add vehicles later.
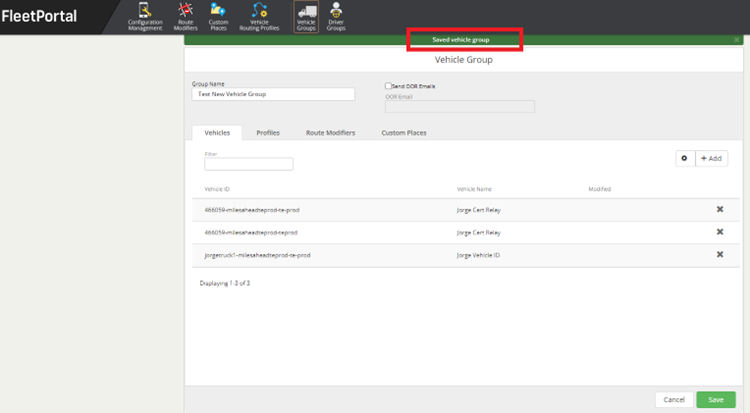
7. Click on the green “Save” button at the bottom of the page, you will see a green notification on top the page.
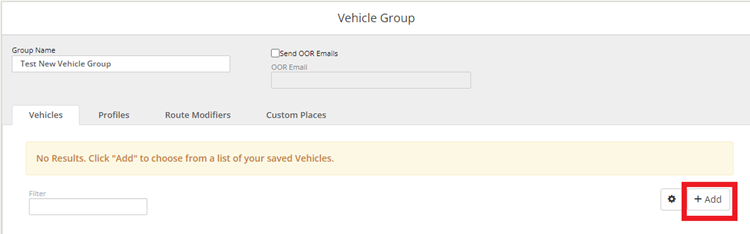
Steps to associate a Vehicle ID to a Vehicle Group in Trimble Fleet Portal
To grant the full integration of the Vehicle and be able to use Fleet Portal tools, the vehicle ID must be associated to a vehicle group.
1. From a browser (Chrome is recommended), visit https://copilotfleetportal.alk.com/login
2. Enter your valid credentials (To get credentials, please contact Trimble Support: support@trimblemaps.com).
3. Select “Vehicle Groups” option located on the top center of the page.

4. Click on the Vehicle Group already created, details of the group will be displayed.
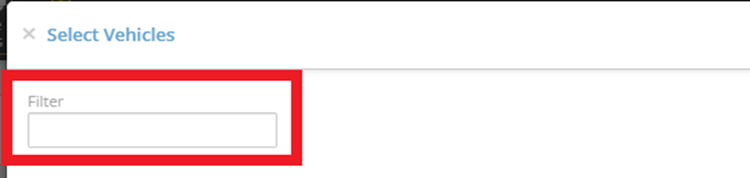
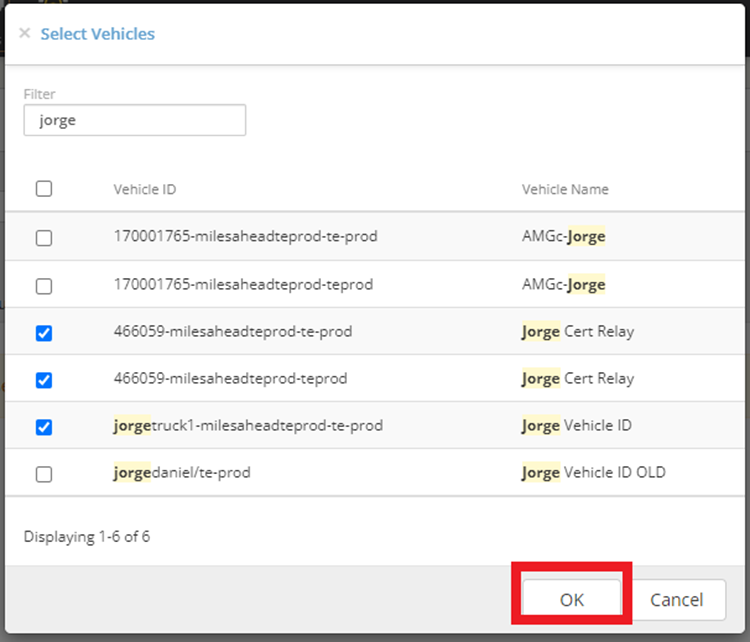
5. Click on “+ Add” button.
6. Type the vehicle ID already created in the “Filter” box.
7. Check the left box of all vehicles that want to be added.
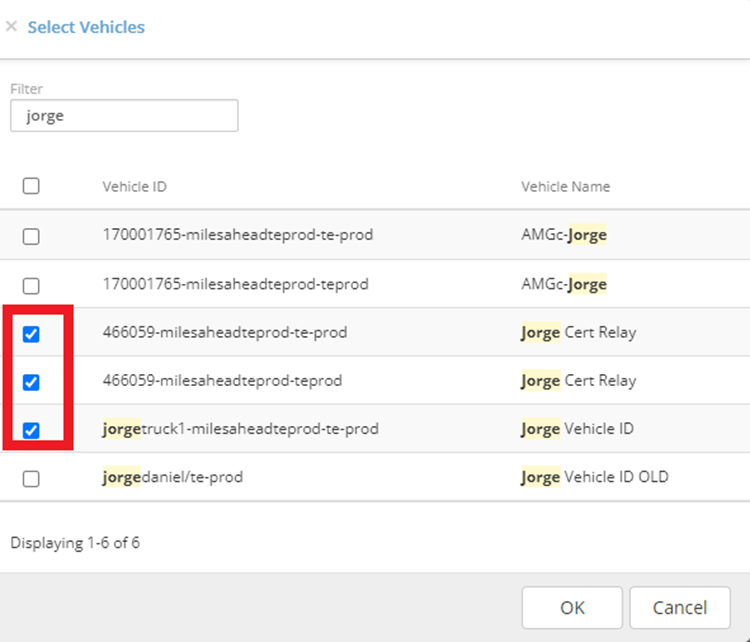
8. Click on “OK” button.
9. Click on the green “Save” button.
10. A green line will be displayed indicating changes have been applied.
Frequently Asked Questions
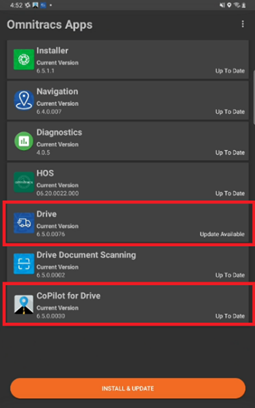
How to check the app and map version of the mobile app?
The app version is displayed in the Omnitracs Installer App.
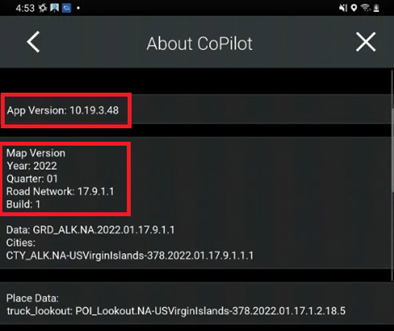
Also, for CoPilot app, the version is displayed in the About CoPilot page.
To review the map version, go to Menu > Settings > About CoPilot page and under the Map Version category you will see the Year and Quarter values.
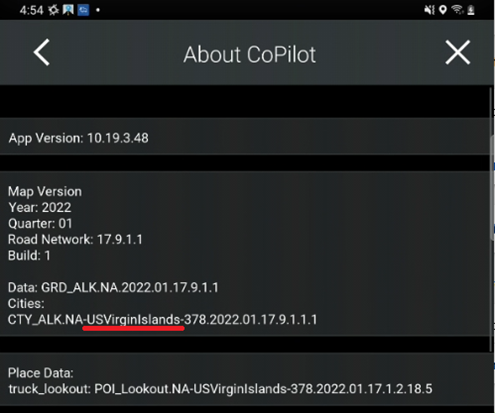
How to know which map region is installed?
To review the map region, go to Menu > Settings > About CoPilot page and under the Map Version category in the Cities row e.g. CTY_ALK.NA-USVirginIslands-378.2022.01.17.9.1.1 - The key is before the numbers.
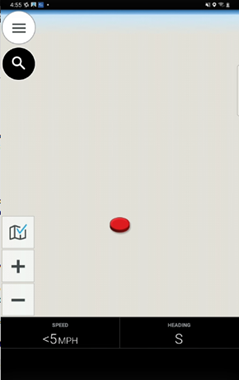
Why do I not see the road segment in the map?
Please make sure that the correct set of maps of the region where your driver will be navigating is installed, this can be checked on the About CoPilot page.
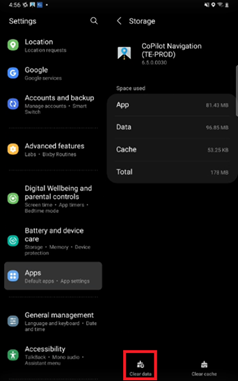
When not having the correct set of maps, the way to go is clear data of the application and relaunch it, since the app does not have any set of maps installed the user will be prompted to download a set of maps.
You can go to Android Settings > Apps > CoPilot Navigation > Storage > Clear data
What if I see the screen where CoPilot says No App Licensing?
This means the Mobile device or partner id is not identified, please make sure that the Mobile ID asset was correctly configured by reviewing the “Steps to add a Mobile Device ID asset in Trimble Fleet Portal” section and the “Steps to add a Vehicle ID in Trimble Fleet Portal" section.
These are some of the terminologies between OT1 and Trimble that you will need to know
|
Term |
RNA Portal/OT1 Portal |
Trimble Fleet Portal |
Driver Experience |
|
Mobile |
Mobile Device ID |
Asset – Device ID |
Mobile ID |
|
Vehicle |
Equipment |
Vehicle ID |
Truck ID |
|
Category Vehicle Group |
Equipment Type |
Vehicle Group |
NA |
Why is the vehicle and mobile Device ID format different that what's in OT1?
Within Trimble Fleet Portal the Mobile and Vehicle IDs need to be unique for the entire Omnitracs partner. This is different than OT1 portal where Vehicle and Mobile IDs need to be different only per Customer account.
Also, Trimble has only one environment to be integrated with, while OT1 has 5 different environments.
Will there be any entity integration between OT1 and Trimble?
Yes, we are planning to improve the experience to reduce the effort to add Vehicles and Mobiles easily across the different portals. In the 6.6 release, equipment and equipment type data will be integrated between OT1 and Fleet Portal.
In the following release we are trying to prioritize the work of integrating mobile device data.
Can I stop the map upgrade?
Yes, just pull down the android notifications menu and select Pause or Cancel.
Will the map upgrade need any user confirmation?
No, when having Wi-Fi this process is automatically run in the background.
How long does the map upgrade take to complete?
This depends on the size of the map region that you wish to download and the speed of the Network, our average time was around 5 minutes for a state like Texas and 15 minutes for a country like USA.
Will the driver be interrupted with the map upgrade?
No, when having Wi-Fi this process is automatically run in the background and won’t need any response from the driver.
Does the Vehicles include trucks (power unit) and trailers?
When using OT1, a Telematic Device is needed to pass the vehicle dimensions.
The Telematic Device is only configured for the Power Unit; therefore, we only include the dimensions set for the Truck.
Do we have to register both Vehicle and Trailer data in Fleet Portal?
Yes, the application technically only needs the Truck ID, but it is better to register both Vehicle and Trailer data.
Where do I need to configure routing profile to be used in CoPilot?
Two areas must be covered when using a Telematic Device.
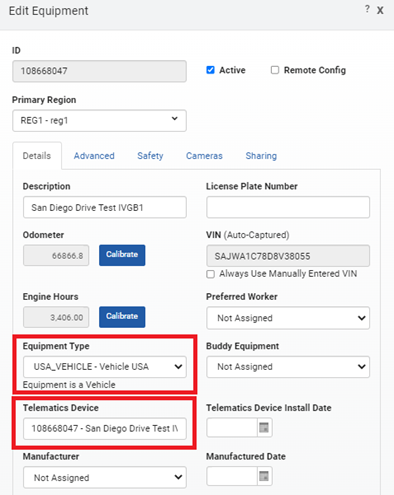
The first one is OT1 portal; the vehicle dimensions are configured under the Equipment Type.
In the Equipment, make sure to have the Equipment Type and a Telematic Device assigned.

How to edit the workflow
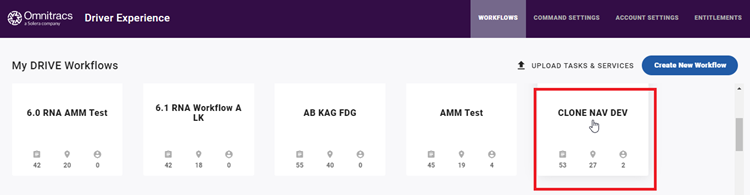
The second area is Command portal; you will need to configure the workflow of your driver.
Please, follow these steps to edit the workflow:
- Enter Command Portal https://ma-command.cld.omnitracs.com/
- In “Workflows” tab > Select the workflow where your Driver is located
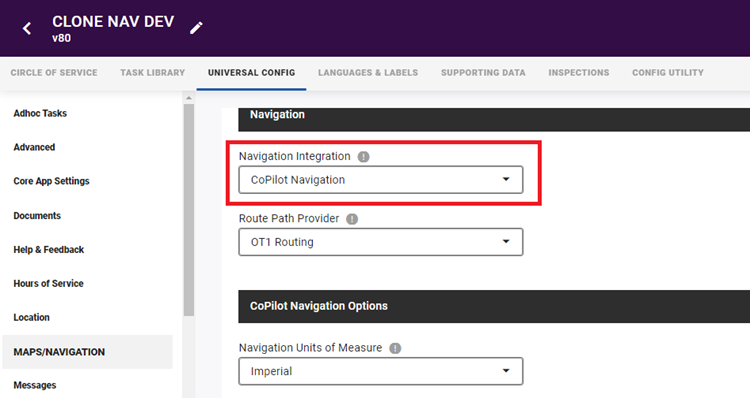
- Under “Universal Config” tab, select “Maps/Navigation”
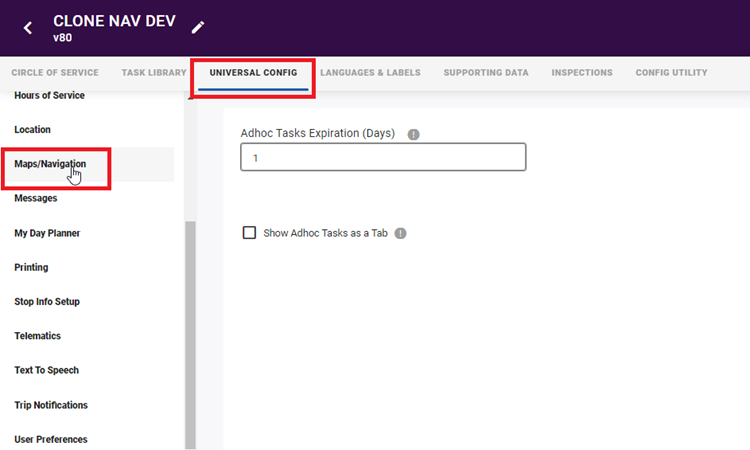
- In the Navigation section select CoPilot Navigation option
- Scroll down and edit the Settings as you wish
What steps do I need follow to onboard 100 new Mobile Devices?
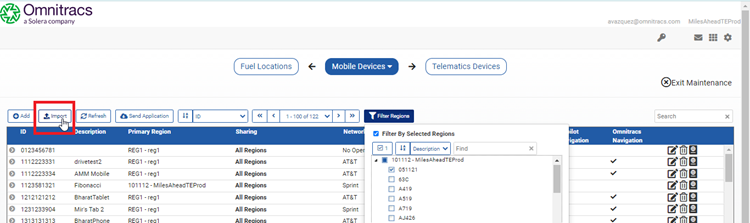
- Import the Mobile Devices in OT1 by going to Maintenance > Mobile Devices > Select Import (Makes sure to have only one Region selected in the Filter)
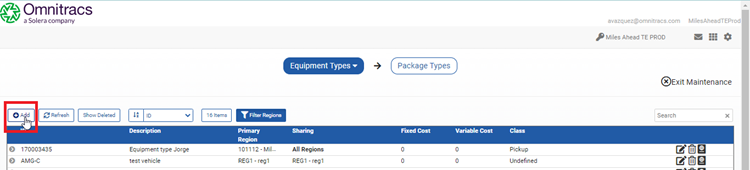
- Add or update an equipment type in OT1 under Maintenance > Equipment Types
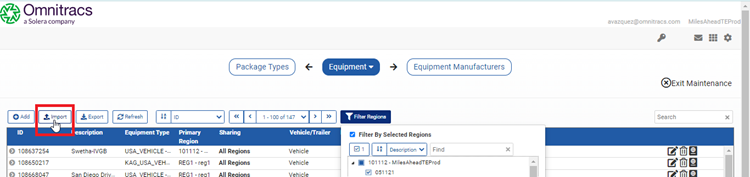
- Import Vehicles in OT1 by going to Maintenance > Equipment > Select Import
- In Command or Driver experience Add or Update an existing workflow and configure the Nav Settings ( To do this please see the “Steps to edit the workflow”)
- In Fleet Portal import the Mobile IDs (To do this please see the “Steps to add a Mobile Device ID asset in Trimble Fleet Portal” section).
- In Fleet Portal import the Vehicle IDs (To do this please see the “Steps to add a Vehicle ID in Trimble Fleet Portal” section).
- In Fleet add or update the Vehicle Group and assign the Vehicle IDs (To do this please see the “Steps to add a Vehicle Group in Trimble Fleet Portal” section and the “Steps to associate Vehicle ID to Vehicle Group in Trimble Fleet portal” section).
Can I downgrade the app to 6.4 version?
No, it is not recommended to downgrade.
Will my drivers be impacted on April 23'th after the 6.5 release?
No, the drivers should not be impacted, all current users of CoPilot are taken care by setting up their mobile device and vehicle ids in Fleet Portal.
This task has been completed by Omnitracs and Trimble support teams.
How to access Fleet Portal, or what should I do if I do not have access to https://copilotfleetportal.alk.com/?
Contact Trimble Support to get access: support@trimblemaps.com
What are the entity changes in Trimble Fleet Portal with 6.5 release?

- For all the existing accounts, the data migration for both Vehicle and Mobile Device IDs had been taken care of.
- All Mobile Devices in OT1 had been imported into Trimble Fleet Portal as Assets and activated for CoPilot Truck License.
- All Equipment Data in OT1 had been imported into Trimble Fleet Portal as Vehicles.
Software Corrections
|
Work Item Number |
Issue |
Component |
| RPE-85027 | Fixed an issue with the integration between CoPilot App and Fleet Portal, with this the FP Route Reporter data is displayed. | CoPilot |
| DCMD-6324 | UNLOAD_DOCUMENTS_ByPass scan will now be grayed out once BOL has been scanned. | Drive/Command |
| RPE-17378 | While performing a Driver Vehicle Inspection Report (DVIR), Drive will no longer display inactive equipment when searching for equipment. | Drive/Command |
| DCMD-6726 | Error message improved when Identity server requests fail. Previously, these failed with a 5xx error (unhandled exception) and now fail with 4xx if an invalid client is used. | Drive/Command |
| DCMD-6770 | Single Sign On: To support the additional security in Android 11, Drive now has the capability to acquire support files such as customer databases from the public Documents folder. | Drive/Command |
| DCMD-6768 | Password: While the device is in-motion, a Co-Driver will no longer be restricted from authenticating if their password was incorrectly entered the first time. | Drive/Command |
| DCMD-6761 | Depart/Done tasks can now be completed in the same minute as the last completed task. | Drive/Command |
| DCMD-6744 | You can now cancel an unplanned stop on a trip originating from Roadnet. | Drive/Command |
| DCMD-6735 | The Core App Settings in Command have been reorganized. | Drive/Command |
| DCMD-6528 | An issue where drivers were sometimes unable to add an unplanned stop to an Adhoc Trip has been corrected. | Drive/Command |
| DCMD-6750 | In OT drive, an Exception being generated from Bump Dock task has been fixed. | Drive/Command |
| DCMD-6850 | We resolved an issue in Drive 6.5 when you press the small red truck icon it no longer takes you to XRS to associate the vehicle. A new button has been added to the "No Vehicles Found" dialog called "Take me there". The user will be navigated to XRS where the connection to the vehicle can be attempted in XRS using "Connect to Vehicle" from XRS dashboard. | Drive/Command |
| RPE-83075 | An issue was resolved when FileUpload integration event for attachment to messaged failed to process with null reference exception. | Drive/Command |
|
DVIR-1407 |
Fixed an issue in Drive where a trailer did not populate the DVIR task when it is included in the Trip Document. |
Drive/Command |
|
DVIR-1369 |
Fixed an issue where the trailer remained in the asset list and was visible during the next DVIR task even after the driver performed a post-trip inspection and selected the drop option from the trailer function drop down list. |
DVIR |
Tags recommended by the template: article:topic