Workflow Integration Tools
Workflow Tools Overview
There are many commercial and open source SOAP web service tools available for creating and testing web services. The tools discussed here are test clients that work well with WMC.
SOAPUI
The Eviware SOAPUI tool is a general-purpose, cross-platform web service client. It is very useful for debugging integration problems because it allows you to build and inspect the methods, payloads, and returned results. This may be a good choice if you run into particular issues getting started.
Workflow .NET WS-Client
The WS-Client is a .NET application designed specifically to test or demonstrate WMC and ESS messaging. It supports both data/datum and canonical message formats and conversion between the two (see Messaging Best Practice). The current version supports legacy OVDW (1.0) and newer WMC (1.1) messaging.
Downloading WS-Client
Click here to download the latest WS-Client (version 1.4.1829).
Please make sure that the WS-Client minor version you are using matches the the minor version of current WMC. The web services should be backward compatible, but you will want to make sure that the XSD for translating to and from canonical form and for validating workflow messages stays in sync with the WMC application.
Installing WS-Client
In order to install the Web Services Client App, create a directory on a local drive where the webServicesClientTool.zip will be copied and extracted to. Once these files are extracted succesfully, the you can begin the configuration.
- The WS-ClientApp requires Microsoft .NET web service security libraries that may need to be installed on your machine. Download "Web Services Enhancements (WSE) 3.0 for Microsoft .NET" from microsoft site.
- Install Microsoft WSE 3.0.msi after download is completed.
You are now ready to configure the Workflow WS-Client example.
Configuring WS-Client
1. Before launching the tool, a configuration file WSClientApp.exe.config under the working directory must be configured with the correct account number, credentials, and device UA. If using an environment besides Qualcomm production, the web services URLs must also be changed as appropriate. Below is a sample configuration file:
|
|
An XML Schema Definition (XSD) is provided to validate and define the acceptable canonical format. Each Driver Workflow application has its own XSD. This file can be copied into your working directory under the XSD folder.
Two XML Stylesheets (XSL) are provided to translate between the canonical format and the Name/Value pair format. XSL files should be copied into your working directory under the XSD folder. ElementsToDatum.xsl translates the canonical format to the Name/Value pair format required by workflow while DatumToElements.xsl translates the Name/Value pair to the canonical format.
Using the WS-Client
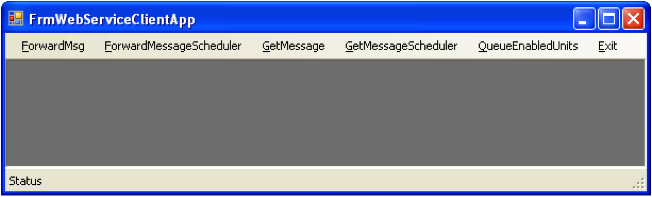
Startup
To start the client, double click the WSClientApp.exe under the working directory and the following screen will appear:
Sending a Forward Message
Select ForwardMsg from the toolbar to launch the forward message screen. The following screen will appear:

All the fields at the top of the screen will be pre-filled based on the information specified in the configuration file. Sample forward messsages are represented in a two different XML formats. The text box shown on the right side displays the forward messages in a canonical XML and they are stored in the current working directory under templates_forwardMsgCanonical while the text box on the left side displays the forward messages in a Name/Value pair and they are located under templates_forwardMsg of the current working directory.
To send a forward message from the Canonical frame, follow the steps below:
- Select the sample forward message from the Template drodown menu
- Click the Generate Payload button. The message will be converted to the Name/Value pair
- Click the Send Message button
- A confirmation popup will appear that the message is sent successfully. In addition, a file Send_<timeStamp>.xml will be created under your working directory that contains the exact payload that got sent out.
To send a forward message from the Payload frame, follow the steps below:
- Select the sample forward message from the Template drodown menu
- Click the Send Message button
- A confirmation popup will appear that the message is sent successfully. In addition, a file Send_<timeStamp>.xml will be created under your working directory that contains the exact payload that got sent out.
Retrieving Return Messages
Select GetMessage from the toolbar to launch the Get Message screen. The following screen will appear:

All the fields at the top of the screen will be pre-filled based on the configuration file that is provided. By default, it retrieves return message from OVDW
To get messages from OVDW, follow the steps below:
- Select OVDW
- Click the Get Messages button. The return message(s) will be displayed on the Response frame. A file GetMessage__<timeStamp>.xml will be generated under the working directory that will contain the same information displayed on this frame.
To get a message from ESS, follow the steps below:
- Select ESS
- Click the Get Messages button. The return message(s) will be displayed on the Response frame. A file GetMessage_ess__<timeStamp>.xml will be generated under the working directory that will contain the same information displayed on this frame.
In order to validate the return message(s) against the XSD, click the Validate button. The return message(s) in a Name/Value pair will be converted into the canonical XML. Each tab will display one return message and Valid or Invalid will be displayed to indicate whether it passes the XSD or not.
Other Menus
ForwardMessageScheduler enables to send forward message in a given interval
GetMessageScheduler enables to retrieve return messages in a given interval
QueEnabledUnits provides workflow unit change notification