Remote presentation view for an IVG
Portable IVG Setup
The IVG has built in capabilities that allow you to connect to the device remotely using a virtual network connection (VNC) to display it on an external monitor. This can be used onsite with a customer to display the IVG screen on a laptop or to an extended Screen projector. The below instructions will assit you in setting up the IVG to perform this action.
NOTE: This conversion alters the IVG to allow for laptop presentations. It cannot go back to an in-cab device.
Required Parts
A. Basic power strip with 6-foot cord.
B. Plugable USB3-1000 USB 3.0 Gigabit Ethernet LAN Network Adapter
C. (2) 3 Ft CAT-5 cables
D. Netgear FS105 – 5 Port 10/100 Faster Ethernet Unmanaged Switch
E. 2.4GHz Wireless Keyboard and Mouse (Note: cannot be Bluetooth)
F. USB thumb drive (empty of files)
Optional Parts:
Ram Mounts for the IVG to make self-standing
Example – (RAM-B-201U-C) (RAM-B-202U) (RAM-B-224-1U)
Creating a mirroring drive
In order to connect to the IVG remotely, certain firewalls must be turned off on the device to allow remote connections.
- Click here to download the files needed for the setup
- Unzip the contents of the file by double clicking on the download. It will most likely uncompress to the same location where you downloaded it, but you may also choose a location to unzip the files.
- Transfer the files that were unzipped to an empty USB thumb drive at the top level. i.e, the files should not be in a folder on the thumbdrive, they should be copied as standalone files on the drive.
Install and Setup of IVG Mirroring Configuration
- Plug in power strip (Part A)
- Using IVG power adapter, plug IVG power into power strip (Part A)
- Plug the Netgear FS105 – 5 Port 10/100 Faster Ethernet Unmanaged Switch (Part D) into the Power Strip (Part A)
- Make Sure IVG is removed from IVG cradle and powered up
- Set IVG on flat surface
- Insert one end of the ethernet cable (Part C) into your computer; Insert the other end into the any port except #1 of the Netgear FS105 – 5 Port 10/100 Faster Ethernet Unmanaged Switch (Part D)
- Insert one end of the ethernet cable (Part C) into port #1 on the Netgear FS105 – 5 Port 10/100 Faster Ethernet Unmanaged Switch (Part D); insert the other end into the Plugable USB3-1000 USB 3.0 Gigabit Ethernet LAN Network Adapter (Part B)
- While maintaining visual contact with IVG screen; insert provided mirroring USB stick into IVG.
- Expect some quick screen flashes and then return to previous IVG screen
- Remove USB stick from IVG
- Insert Plugable USB3-1000 USB 3.0 Gigabit Ethernet LAN Network Adapter 9 (Part B) into TOP RIGHT USB Port on IVG
- Insert wireless combo keyboard and mouse into BOTTOM RIGHT USB Port and make sure they are functional. Do NOT use the charging cable.
- The IVG is now connected and ready to start the Conversion process.
Setting up winvnc
Any computer with VNC software should be able to connect to the IVG if it is on the same network.
- Download the free version of VNC Connect from internet:
- Follow the software instructions to install it on your PC.
Activating VNC on the IVG
The following steps will help you identify the IP address of the IVG. Take note that the steps must be done sequentially and quickly so read through ALL instructions of this process before attempting.
- Pay close attention as you perform the following sequence in half second intervals.
- Press and Hold Brightness up button for 6 seconds
- Press Home Button
- Press volume up
- Press home button
- Press volume up and continue pressing and releasing the button until you reach a blue screen like the one below. Be careful not go too far; stop when you see screen below. Click here to watch a video on the process.
Again, DO NOT stop tapping the volume up button until you reach the blue screen with a white box that says “command” at the top, most likely after 3-4 taps.

- If when pressing the volume up button in step e – you go past the screen above; unplug IVG power from power strip
*** Do not be discouraged, this may take a few attempts to complete step 15.
- Wait 30 seconds
- Plug power back in, allow IVG to power up and home screen
- Go back to step 15
- NOTE: doing this too many times may lock up the IVG and it will need to be restarted. You can either unplug it from the wall and wait 30 seconds or push and hold the reset button on the left side of the IVG under the rubber cover.
- On the command screen, use the keyboard/mouse left click with mouse the command button.
- Left click & Select “Command Prompt”

- In the DOS prompt window, type “IPCONFIG” using the keyboard. Then push enter.
- The IVG will scroll through available IP addresses.
- Note: there is one that says Ethernet Adapter [Cellular line], that is NOT the one you are looking for.
- The one needed will be near the top of the data, listed as IPv4 Address, use mouse to scroll up until you see “Ethernet adapter” [ex.AX88179_178A1]

- The one needed will be near the top of the data, listed as IPv4 Address, use mouse to scroll up until you see “Ethernet adapter” [ex.AX88179_178A1]
- Write down the IPv4 (Preferred) address of the IVG, it should look something like:
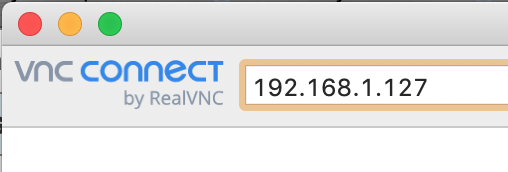
EXAMPLE ONLY ->192.168.1.127 - On your computer, open WIN File downloaded from Step 13
- Enter the IVG IP address (DO NOT PRESS ENTER)
- Use your keyboard attached to IVG to scroll to bottom of current IVG IP information, type WINVNC into the command prompt and press enter.
- Now on your computer - press Enter
- Immediately, the IVG will begin to display a series of text strings
- You should now see this on your computer – Press Continue

- YOU SHOULD NOW BE ALMOST MIRRORING – You are almost done, hang in there, just a few more steps needed for full set up.
- FROM THE IVG:
- Press and Hold Brightness up button for 6 seconds
- Press Home Button
- Press volume up
- Press home button
- Press volume up and continue pressing button maybe 3 times, to get back to the IVG Home screen. (you have to go past the please wait)
**** If you power down the IVG after mirroring, you will need to perform these steps again to reestablish the mirroring connection for the next session.