Pick Up Tasks (Arrival & BOL Upload)
Task #1: Arrival to Pick
Once the driver arrives to the facility of the Shipper the Task #1 of the applicable stop must be completed. This task is just to confirm that the driver has arrived to the location.
After tapping on the "Start Task" button, if drivers are using a vehicle that doesn't support a trailer, the Task #1 of the arrival or delivery will be finished.

If the driver is using a vehicle type that support trailers, they will be prompted with the Drop & Workflow:
- Drivers will be able to specify:
- If they are live loading.
- If they are dropping and/or hooking a trailer.
- If drivers are dropping a trailer, they will be able to specify if the trailer has Freight On Board or not.
- If drivers are hooking to a trailer, they will be able to enter the new Trailer ID.
- Afterwards, driver will need to tap on the "Confirm Status" button to finish with the Task #1 of the arrival.


Task #2: Loaded - Provide BOL Details
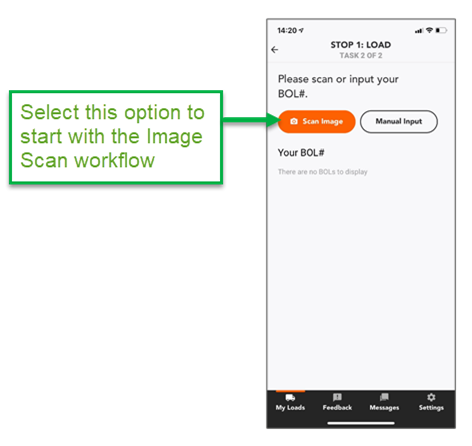
After confirming the arrival to the Shipper's facility, Sylectus Driver will provide two methods for entering Bill of Lading (BOL) information:
- Scan Image Process: Scan the BOL by taking a picture and tapping in the relevant information.
- Manual Input Process: Manually enter data in the fields.
Note: The first option is only available to Sylectus customers who subscribe to Imaging, as a copy of the scanned BOL is saved with the TO.
Scan Image Process
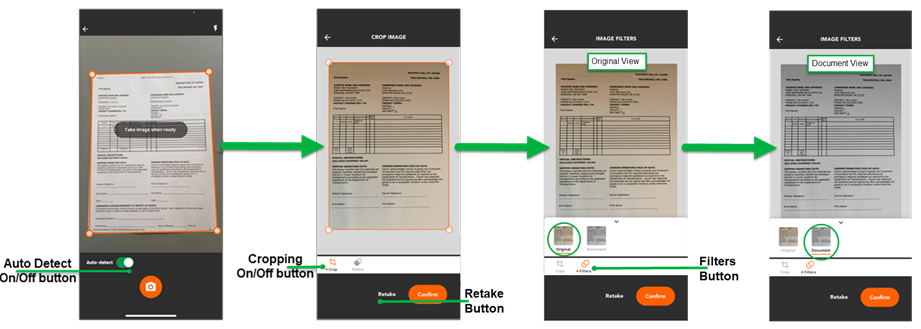
- Select the Scan Image button. The app opens the phone’s camera and an orange rectangle for image detection appears.
Note: The driver can disable this feature by turning off the auto-detect button. - When the BOL has been detected, click on the orange camera button.
- The driver can use the cropping feature to crop the image and adjust the rectangle detection to outline the BOL only. Please note that the driver can disable this feature by selecting the orange crop sign on the bottom left of the screen.
- The driver can also apply a filter to the image (original or document view).
- If the picture is not clear, select the Retake button and repeat steps 2 and 3.
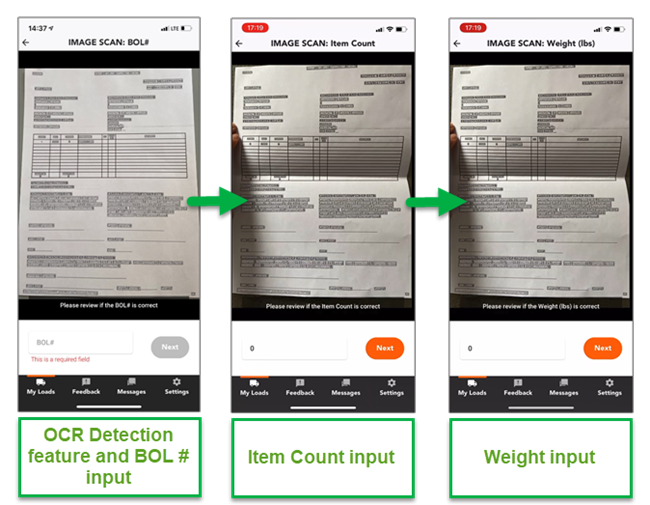
- Once the image has been scanned, the OCR detection feature will select all the fields detected on the image.
- To enter the BOL #, tap on the part of the image where the number is shown. To deselect, tap on the same area again. Make sure the correct number is showing in the bottom text box. If it is not, you can change it manually. Once it is correct, select on the Next button. The driver can zoom in and zoom out of the picture as necessary.
- Repeat step 5 to enter the Item Count number and the Weight information, then select the Next button.
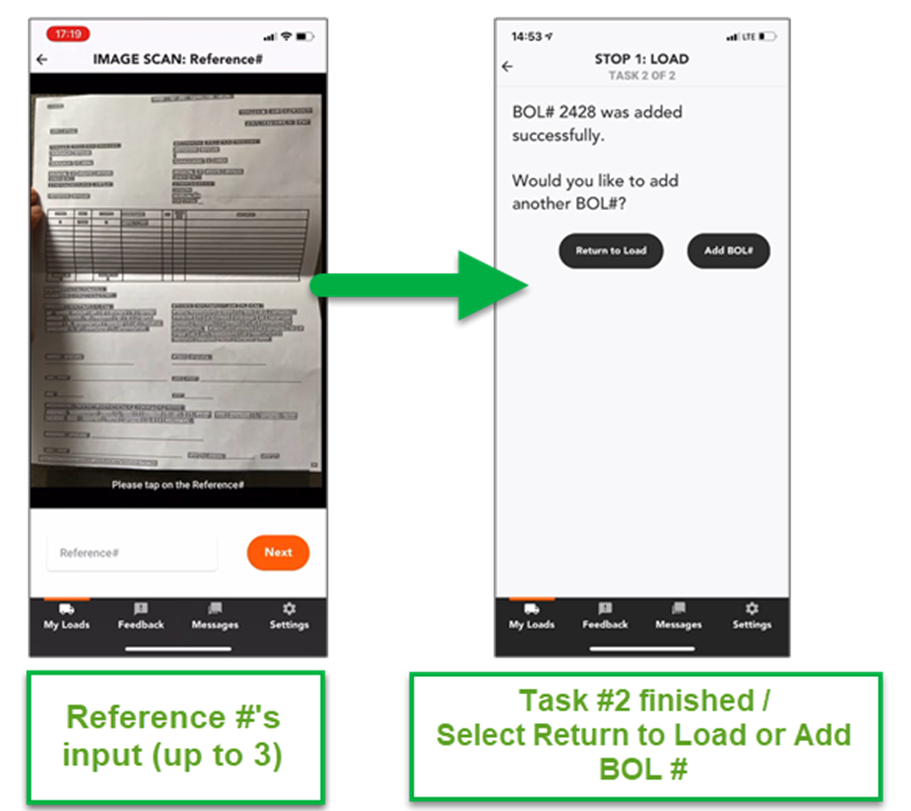
- Enter the Reference #'s if applicable, drivers can enter up to 3 references, and select the Next button. This can be an alphanumeric value.
- The driver will be asked if another BOL needs to be added to the order. If yes, select the Add BOL # button and enter the required information. If no, select the Return to Load button.
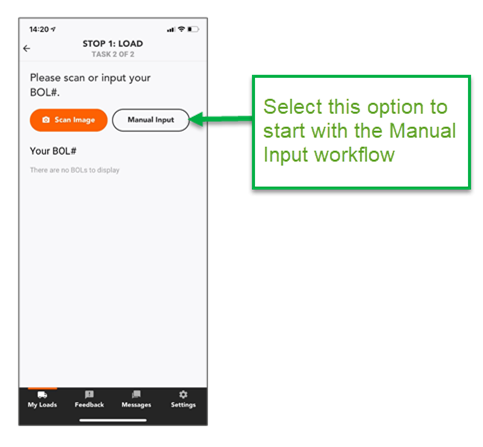
Manual Input Process
- Select the Manual Input button.
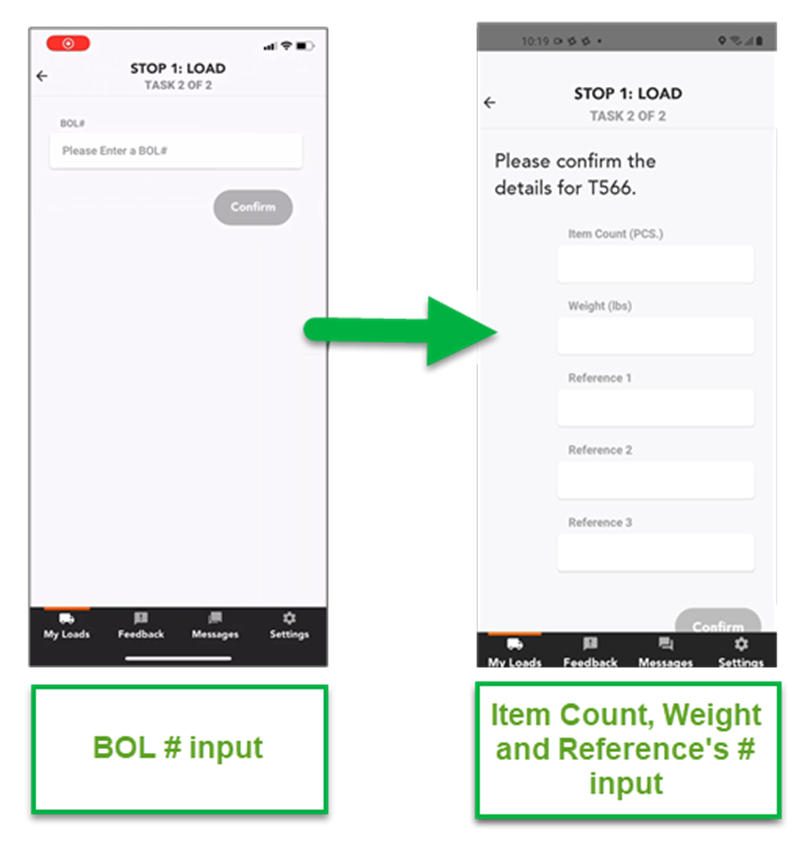
- Enter the BOL # and select the Confirm button.
- Enter the Item Count (PCS.), Weight (lbs.), and Reference #'s (up to 3), then select the Confirm button.
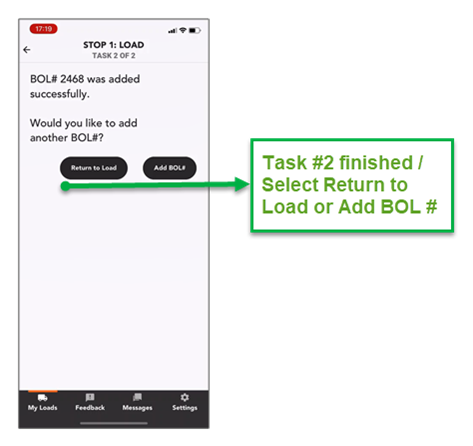
- The driver will be asked if another BOL needs to be added to the order. If yes, select the Add BOL # button and enter the required information. If no, select the Return to Load button.
Please note that if the driver enters the BOL information manually, the driver will need to upload an image of the BOL later on; in the meantime, the following notification will appear at the top of the order:

Drivers can see all uploaded documents at the bottom of the overview screen by tapping on the document type. In the same section the driver will be able to upload the load documents that were not uploaded at the time of the pick-up.
Note: Document images can be uploaded at any time during the order process.